Skip to content
Black mold under sink areas is more than just an eyesore—it can pose serious health risks if left untreated. I’ve dealt with this problem in my own home, and I know how frustrating it can be to find that telltale musty smell and those dark patches creeping beneath your sink.
The good news? Getting rid of it doesn’t have to be a complicated process. In this article, I’ll walk you through a fast and easy method that tackles the issue head-on, so you can reclaim a clean and healthy home environment. Let’s dive in!
Understanding Black Mold and Its Causes
Black mold under sink areas is a sneaky problem. It can catch anyone off guard. I found it in my kitchen once, hiding behind cleaning supplies. It’s not just about ugly black spots. Black mold can cause health problems like allergies or breathing issues. But don’t worry—knowing the causes helps you stop it.
According to the Centers for Disease Control and Prevention (CDC), black mold exposure can exacerbate respiratory conditions, cause nasal congestion, and even lead to long-term health problems in individuals with compromised immune systems.
What is black mold? It’s a fungus that loves damp, dark places. Think about the area under your sink. Leaks, spills, or even condensation make it perfect for mold. If water stays there, mold can easily grow. The Environmental Protection Agency (EPA) highlights that persistent moisture is a leading cause of indoor mold growth.
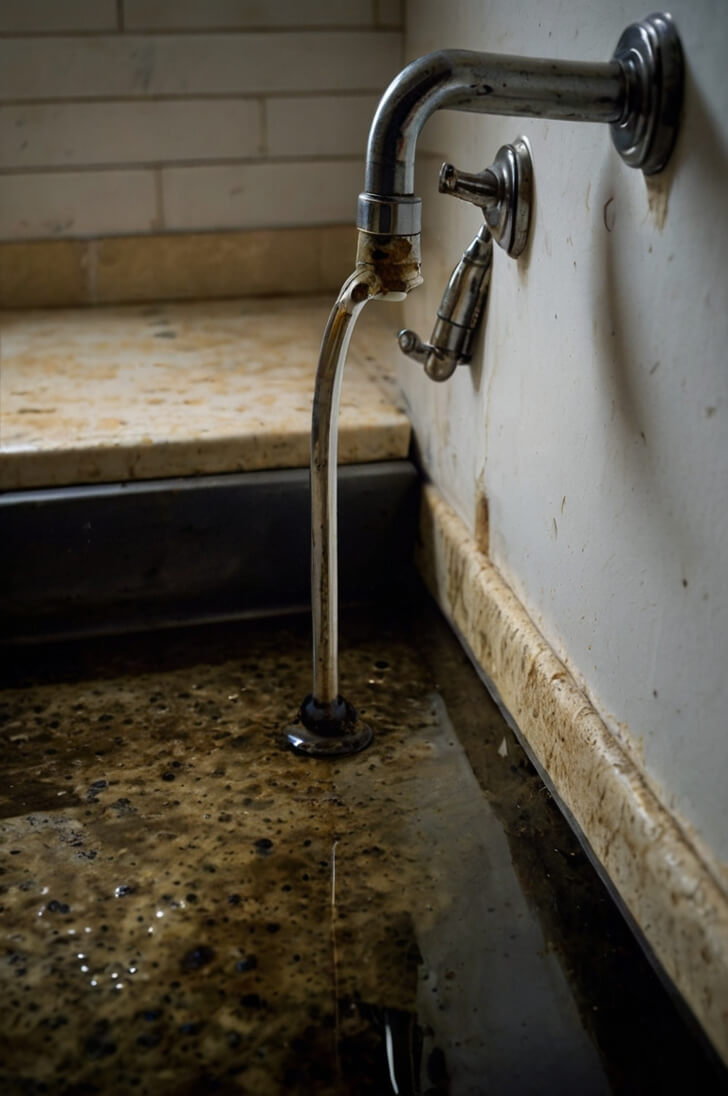
Leaks are a big cause. A tiny drip might not seem bad, but over time, it soaks into surfaces like wood. This gives mold a place to grow. Poor airflow also makes it worse. If air can’t move, moisture stays, and mold thrives.
Condensation is another problem. For example, when pipes are colder than the air, water drops can form. These drops collect in dark spots. This makes it easy for mold to grow.
From my experience, fixing the cause is key. Fix leaky pipes or improve airflow first. Once the moisture is gone, you’re halfway to solving the problem. Next, we’ll look at how to spot mold and get rid of it fast.
Signs of Black Mold Under Sink
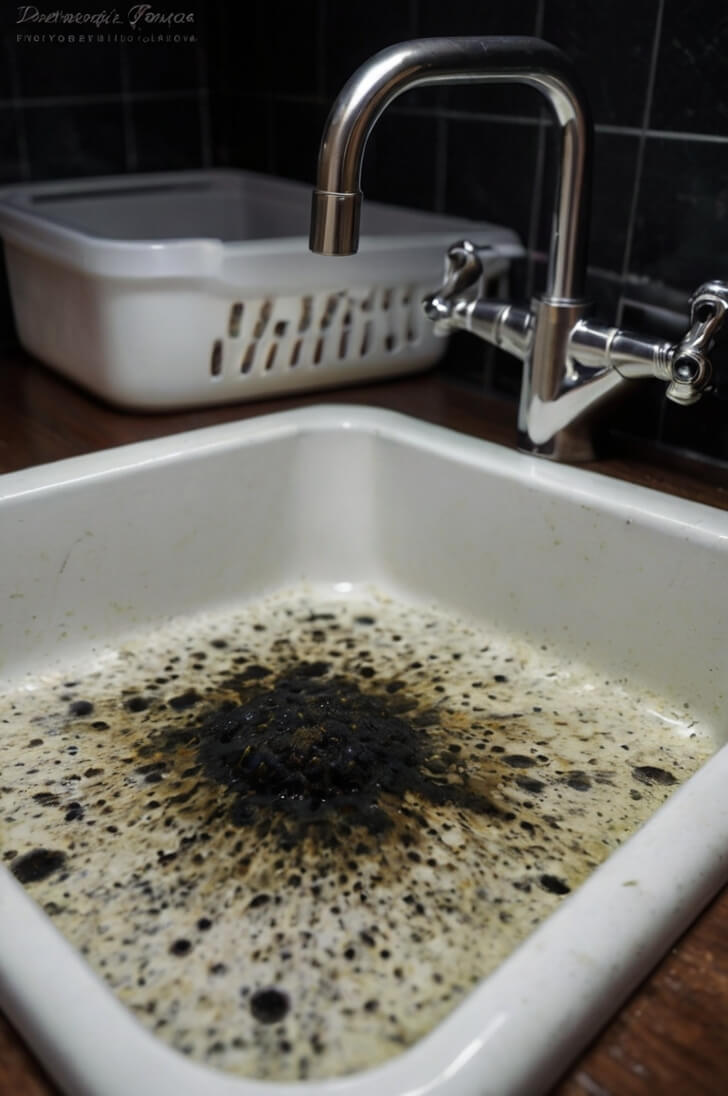
Spotting black mold under sink areas early can save you a lot of trouble. The first thing you might notice is discoloration. Look for black or green patches on the surfaces under your sink. I once saw faint black spots on the back wall of my sink cabinet and thought it was dirt at first—turns out, it was mold starting to grow.
Another common sign is a musty smell. That unpleasant, damp odor is a big clue that mold might be lurking nearby. If you open your sink cabinet and feel like you’re stepping into an old, damp basement, it’s time to investigate further.
Black mold doesn’t just affect what you see and smell. It can also damage the materials under your sink. For example, if you have particle board, you might notice it warping or softening. This happens because the mold breaks down the surface over time, making it weaker.
Structural damage caused by mold can spread beyond the sink cabinet. Left untreated, it may impact nearby flooring, walls, or even plumbing, leading to costly repairs.
Detecting mold early not only saves money on repairs but also minimizes health risks. Long-term exposure to mold spores can lead to respiratory problems, asthma, or even fungal infections in individuals with weakened immune systems.
Catching these signs early is key. If you notice discoloration, a musty smell, or damage to materials, take action immediately. In the next section, we’ll discuss how to prepare for safe and effective mold removal.
Preparation Before Mold Removal
Getting ready to remove black mold under sink areas is just as important as the cleaning itself. Trust me, I learned this the hard way when I rushed in without the right prep and ended up making a bigger mess. Let’s make sure you’re fully prepared so the process is smooth and effective.
Before starting, you may want to test the air quality in the affected area. Mold test kits are available at most hardware stores and can help you identify the extent of the mold problem. If the mold covers more than 10 square feet or has penetrated deeply into porous materials, consult a professional for safe remediation.
Safety First: Your health matters most. Before you start, put on gloves, a mask, and protective eyewear. Mold can release spores into the air, and you don’t want to breathe those in. Also, make sure the area is well-ventilated. Open windows or turn on a fan to keep fresh air circulating. It’s a simple step, but it makes a big difference.
Gather Your Supplies: Having the right tools on hand saves time and frustration. Here’s what you’ll need:
A mold control spray or a strong household cleaner.
A sponge or scrubbing brush to remove mold residue.
Mold-resistant paint to seal and protect the area afterward.
I personally recommend a mold control spray from your local hardware store. It’s easy to use and highly effective. Once, I tried a DIY solution with vinegar and baking soda. While it worked, the store-bought spray was faster and more thorough.
For eco-conscious readers, consider using natural solutions like hydrogen peroxide, tea tree oil, or white vinegar as effective alternatives to chemical sprays.
Personal Tip: Lay down a plastic sheet or old towel under the sink before you start. This keeps the surrounding area clean and catches any drips or debris. It’s a small step that saves cleanup time later.
Taking these precautions ensures you’re ready to tackle the mold safely and efficiently. In the next section, we’ll dive into the step-by-step process to get rid of black mold for good.
Step-by-Step Process to Remove Black Mold Under Sink
Removing black mold under sink areas doesn’t have to be overwhelming. Let’s break it down step by step so you can handle it like a pro. I’ve followed this exact method before, and it works like a charm.
Step 1: Fix the Source of Moisture: The first step is to stop the moisture that’s feeding the mold. Check for leaky pipes or condensation. Tighten loose fittings or replace damaged parts. I remember finding a tiny drip in my pipe—it didn’t seem like much, but it was enough to cause mold. Once the leaks are fixed, dry the area completely with a fan or towel.
Step 2: Apply Mold Control Spray: Next, grab a mold control spray or a strong cleaner. Spray it directly on the moldy spots. Make sure to cover the entire area evenly. Let it sit for about 24 hours to kill the mold. The wait might seem long, but trust me, this step is crucial to prevent the mold from coming back.
Step 3: Remove Mold Residue: After the spray has done its job, it’s time to clean up. Use a sponge or scrubbing brush to scrub away the mold. Be thorough but gentle to avoid damaging the surfaces. One time, I used an old toothbrush for hard-to-reach corners—it worked wonders! Wipe the area clean with a damp cloth when you’re done.
Step 4: Encapsulate with Mold-Resistant Paint: Now that the mold is gone, seal the area with mold-resistant paint. This step locks in any microscopic remnants and prevents new mold from forming. Apply a smooth, even coat and let it dry completely. If you’ve never used this type of paint before, don’t worry—it’s just like regular paint but with extra protection.
Step 5: Apply Trim Paint for Additional Protection: For added durability, finish with a coat of semi-gloss or gloss trim paint. This not only protects the surface but also makes it easier to clean in the future. You can even apply multiple coats if you want maximum protection.
By following these steps, you’ll have a clean and mold-free space under your sink. In the next section, we’ll discuss specific tips for different sink types and how to handle unique challenges like mold on particle board.
Special Considerations for Different Sink Types
Not all sinks are the same, and that means dealing with black mold under sink areas can vary too. Let’s explore some unique challenges and tips for different sink setups so you can handle them confidently.
Mold Under Bathroom Sink: Bathroom sinks come with their own set of challenges. With constant exposure to water from face washes, shaving, and cosmetic spills, moisture can linger longer than you realize.
I once found mold growing around the edges of a bathroom sink after leaving a damp washcloth nearby—a mistake I won’t make again! To tackle this, keep the area dry by wiping up water after use and ensuring no cosmetic residue build-up. You can also add a dehumidifier if the bathroom lacks ventilation.
Mold Under Sink Particle Board: If your sink cabinet is made from particle board, it’s especially vulnerable to mold. Particle board absorbs moisture quickly, causing it to warp or weaken.
I learned this the hard way when I discovered the base of my kitchen cabinet buckling under a slow leak. For particle board, act fast: seal any exposed edges with a waterproof sealant and replace severely damaged sections. Consider using a liner or mat to protect the surface from future moisture.
General Tips for Any Sink Type: Regardless of the sink type, prevention is key. Always fix leaks as soon as you spot them. Adding absorbent liners can help catch drips before they soak into the surface. And remember, regular cleaning with a mild mold-resistant spray can make a huge difference in keeping black mold at bay.
For homes in humid climates, adding a dehumidifier near the sink area can significantly reduce moisture levels and prevent mold growth.
If the mold is extensive or recurring, consult a professional for an evaluation. Professionals have tools like HEPA vacuums and antimicrobial treatments that are more effective for large-scale problems.
Understanding the unique needs of your sink type helps you stay ahead of mold problems. In the next section, we’ll cover how to prevent mold from coming back once you’ve cleared it out.
Preventing Mold Reoccurrence
Once you’ve tackled black mold under sink areas, the next step is keeping it from coming back. Prevention is key, and it’s easier than you think if you stay proactive. Let me share some tips that worked for me and have kept my sink cabinets mold-free for years.
Regularly Inspect Plumbing for Leaks: Make it a habit to check under your sink for any signs of drips or leaks. Even a tiny drip can lead to moisture buildup over time. I once caught a slow leak during a routine check and fixed it before it caused any damage. A quick inspection every month can save you a lot of trouble later.
Keep the Sink Cabinet Dry: Moisture is mold’s best friend. Use absorbent liners or mats inside your cabinet to catch any accidental spills. If you notice any wet spots, dry them immediately. I also keep a small hand towel under my sink for quick cleanups—it’s a simple trick that makes a big difference.
Maintain Proper Ventilation: Good airflow helps reduce humidity levels. If your sink area feels stuffy, consider using a small fan or opening nearby windows to improve ventilation. In bathrooms, an exhaust fan can work wonders in keeping the space dry and fresh.
Periodic Cleaning with Mold-Resistant Sprays: Even if your sink looks clean, regular maintenance goes a long way. Wipe down surfaces with a mold-resistant spray every few weeks. It’s a small step, but it creates a protective barrier that keeps mold from finding a foothold.
Also, To prevent mold in the long term, monitor your home’s humidity levels. Use a hygrometer to ensure humidity stays below 50%, as recommended by the EPA.
By following these tips, you can keep mold at bay and ensure your sink area stays clean and healthy. It’s all about staying vigilant and addressing small issues before they turn into big problems. In the final section, we’ll wrap up with a recap and a call to action to keep your home mold-free.
Conclusion
Getting rid of black mold under sink areas doesn’t have to be a daunting task. With the right approach and a little effort, you can tackle the problem quickly and effectively.
Remember, the key is to address the root cause—fixing leaks and ensuring proper ventilation—to prevent mold from making a comeback.
I’ve been through the frustration of dealing with mold myself, and I know how satisfying it is to reclaim a clean, safe space. Whether it’s using a mold control spray, applying mold-resistant paint, or taking preventive measures like regular inspections, each step brings you closer to a healthier home.
Now it’s your turn! Take action today and share your progress. If you have any questions or tips from your own experiences, leave a comment below. Let’s keep the conversation going and help each other create mold-free, comfortable living spaces.
FAQs: Black Mold Under Sink
What causes black mold under sinks?
Black mold under sinks thrives in damp, poorly ventilated spaces caused by leaks, spills, or condensation. Fixing these issues can prevent mold growth.
How do I know if I have black mold under my sink?
Look for black or green patches, a musty smell, or signs of damage like warping on surfaces under your sink. Early detection is key.
Can I remove the black mold under my sink myself?
Yes, you can remove black mold under sinks using mold control spray, a scrubbing brush, and proper safety gear. Follow step-by-step instructions for safe cleanup.
What products work best to remove black mold under sinks?
Mold control sprays or strong household cleaners are effective. For added protection, seal the area with mold-resistant paint after cleaning.
Is black mold under sinks dangerous?
Yes, black mold can cause health issues like allergies or breathing problems, especially if left untreated. Prompt removal is important for safety.